Dot’s Twitter Bots

I made some Twitter bots! It was mostly very easy.

The bots I made use Zach Whalen’s SSBot, documented in “How to Make A Twitter Bot with Google Spreadsheets version 0.4” which includes all the information you need about how to link your Twitter account to the spreadsheet and start the bot tweeting. The only thing I’ll note is that the Spreadsheet’s “Project Key” (asked for in Step 4) is depreciated; you’ll need to use the Script ID instead (it’s located directly under the Project Key in the Spreadsheet’s Project Properties).

Once you link the Twitter account to the SSBot, you enter data in the spreadsheet and that data is what gets tweeted.

Here’s a list of bots I made:

For all but WhyBeBot I generated a list of 140 line strings and pasted it into column one of the “Select from Columns” tab in the SSBot spreadsheet. This was really the most difficult and interesting part, because in each case I had to figure out how to download and process the texts. For example, for CollationBot I had to figure out how to pull out just the collation formulas from the records, while for the full-text bots I had to download the texts, find the sentences, and ideally find sentences that were less than 140 characters (if you pay attention you can see that these bots were created over time, and I got much better later on about including only complete sentences). Clearly most of these bots were made before Twitter increased to 280 characters; I may go back and lengthen the strings someday.

WhyBeBot is a bit different. It takes advantage of SSBot’s ability to mix content among columns. Instead of just one column, WhyBeBot has four columns. The first contains only “Why be ” while the third contains only “when you can be “, and the second and fourth both have a randomly-generated list of a few hundred adjectives.

There are many other ways to make Twitter bots (I know that a lot of people have had good luck with Cheap Bots Done Quick – I’ve never tried it, maybe someday). I would like to do more bots, the setup is pretty simple and getting the content situated is a fun challenge.

How to download images using IIIF manifests, Part II: Hacking the Vatican

Last week I posted on how to use a Firefox plugin called Down them All to download all the files from an e-codices IIIF manifest (there’s also a tutorial video on YouTube, one of a small but growing collection that will soon include a video outlining the process described here), but not all manifests include direct links to images. The manifests published by the Vatican Digital Library are a good example of this. The URLs in manifests don’t link directly to images; you need to add criteria at the end of the URLs to hit the images. What can you do in that case? In that case, what you need to do it build a list of urls pointing to images, then you can use Down Them All (or other tools) to download them.

In addition to Down Them All I like to use a combination of TextWrangler and a website called Multilinkr, which takes text URLs and turns them into hot links. Why this is important will become clear momentarily.

Let’s go!

First, make sure you have all the software you’ll need: Firefox, Down Them All, and TextWrangler.

Next, we need to pull all the base URLs out of the Vatican manifest.

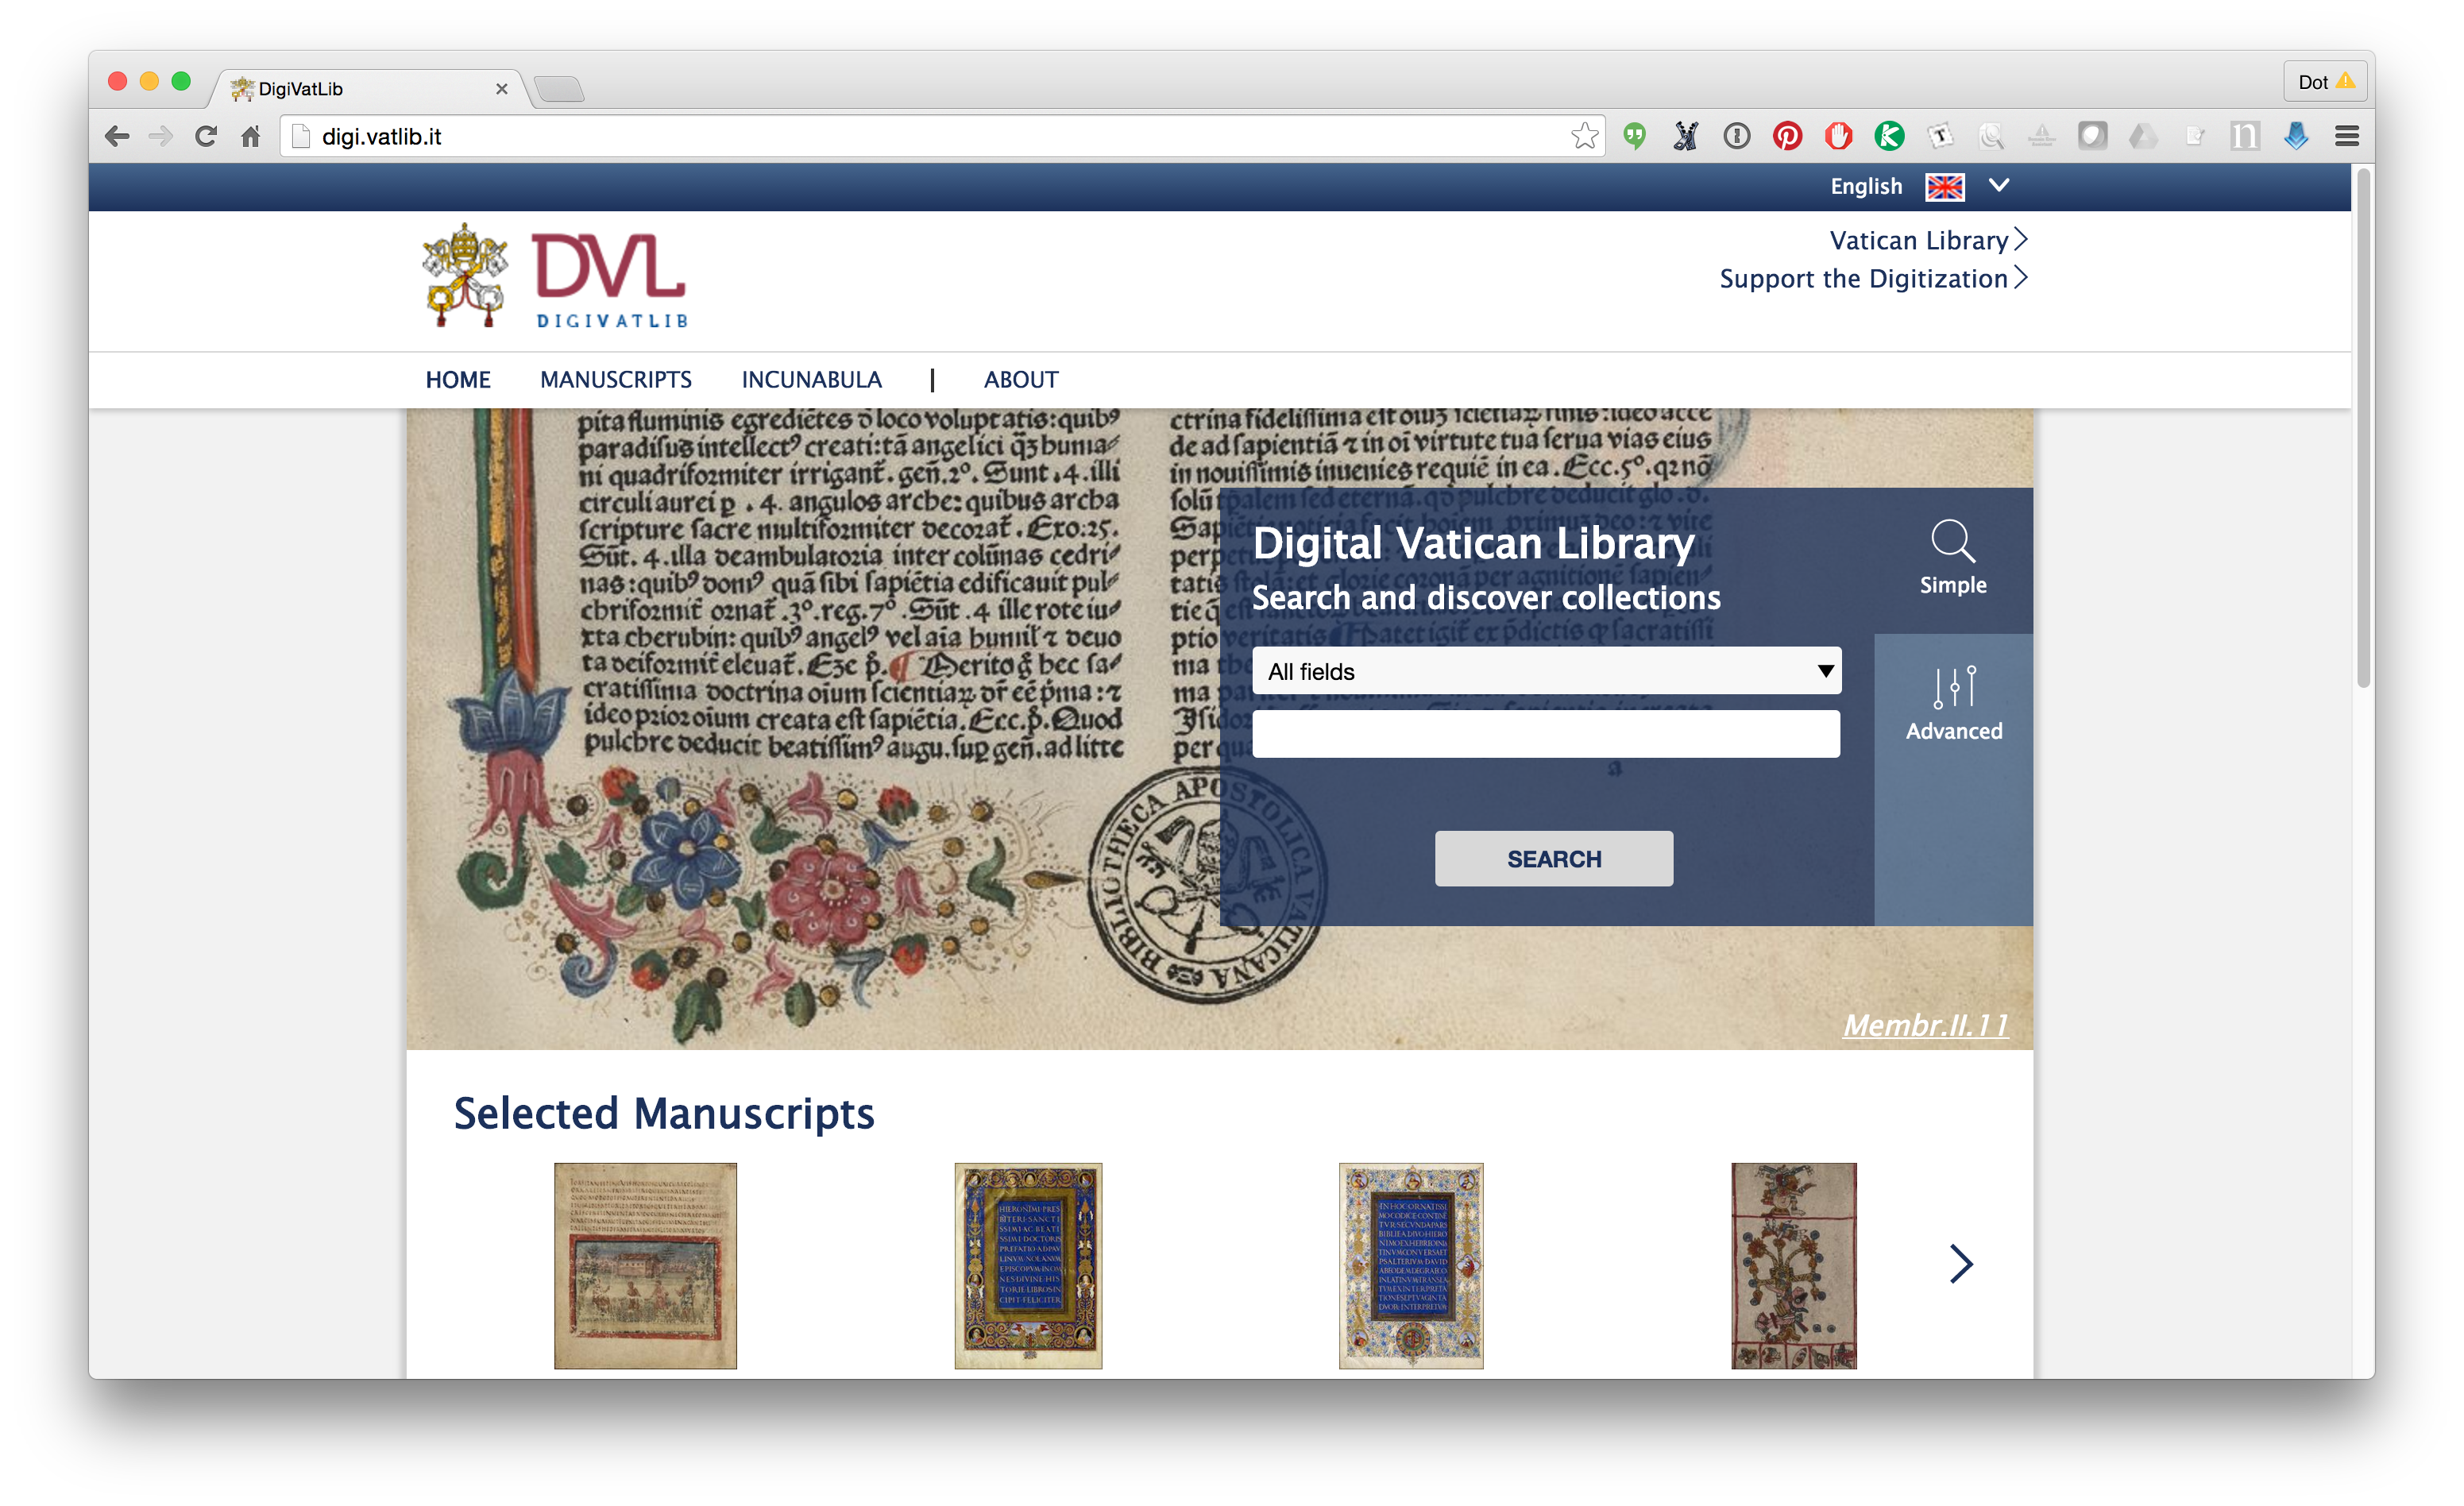
  1. Search the Vatican Digital Library for the manuscript you want. Once you’ve found one, download the IIIF manifest (click the “Bibliographic Information” button on the far left, which opens a menu, then click on the IIIF manifest link)
    Vatican Digital Library.
    Vatican Digital Library.

    Screen Shot 2016-07-19 at 9.40.49 AM
    Viewing Bibliographic Information. IIIF manifest is on the bottom of the list
  2. Open the manifest you just downloaded in TextWrangler. When it opens, it will appear as a single long string:
    Manifest open in TextWrangler.
    Manifest open in TextWrangler.

    You need to get all the URLs on separate lines. The easiest way to do this is to find and replace all commas with a comma followed by a hard return. Do this using the “grep” option, using “\r” to add the return. Your find and replace box will look like this (don’t forget to check the “grep” box at the bottom!):

    Find and replace. Don't forget grep!
    Find and replace. Don’t forget grep!

    Your manifest will now look something like this:

    Manifest, now with returns!
    Manifest, now with returns!
  3. Now we’re going to search this file to find everything that starts with “http” and ends with “jp2” (what I’m calling the base URLs). We’ll use the “grep” function again, and a little regular expression that will match everything between the beginning of the URL and the end( .* ). Your Find window should look like this (again, don’t forget to check “grep”). Click “Find All”:
    Find the URLs that end with "jp2"
    Find the URLs that end with “jp2”

    Your results will appear in a new window, and will look something like this:

    Search results.
    Search results.
  4. Now we want to export these results as text, and then remove anything in the file that isn’t a URL. First, go to TextWrangler’s File menu and select “Export as Text”:
    Export as Text.
    Export as Text.

    Save that text file wherever you’d like. Then open it in TextWrangler. You now need to do some finding and replacing, using “grep” (again!) and the .* regular expression to remove anything that is not http…jp2. I had to do two runs to get everything, first the stuff before the URLs, then the stuff after:

    Before first search.
    Before first find and replace.
    After first search.
    After first find and replace.
    Before second find and replace.
    Before second find and replace.

    After second find and replace.
    After second find and replace.
  5. You will notice (I hope!) that there are forward slashes (\) before every backslash/regular slash (/) in the URLs. So we need to remove them too. Just to a regular find and replace, DO NOT check the “grep” box:
    Before the slash find and replace.
    Before the slash find and replace.
    After the slash find and replace.
    After the slash find and replace.

    Hooray! We have our list of base URLs. Now we need to add the criteria necessary to turn these base URLs into direct links to images.

    I keep mentioning the criteria required to turn these links from error-throwers to image files. If you go to the Vatican Digital Library website and mouse over the “Download” button for any image file, you’ll see what I mean. As you mouse that button over a bar will appear at the very bottom of your window, and if you look carefully you’ll see that the URL there is the base URL (ending in “jp2”) followed by four things separated by slashes:

    Check out the bits after "jp2" in the URL.
    Check out the bits after “jp2” in the URL.

    There is a detailed description of what exactly these mean in the IIIF Image API Documentation on the IIIF website, but basically:

    [baseurl]/region/size/rotation/quality

    So in this case, we have the full region (the entire image, not a piece of it), size 1047 pixels across by however tall (since there is nothing after the comma), rotation of 0 degrees, and a quality native (aka default, I think – one could also use bitonal or gray to get those quality of images). I like to get the “full” image size, so what I’m going to add to the end of the URLS is:

    [baseurl]/full/full/0/native.jpg

    We’ll just do this using another find and replace in TextWrangler.

  6. We’re just adding the additional criteria after the file extension, so all I do is find the file extension – jp2 – and replace all with “jp2/full/full/0/native.jpg”.
    Adding criteria: before find and replace.
    Adding criteria: before find and replace.
    Adding criteria: After find and replace.
    Adding criteria: After find and replace.

    Test one, just to make sure it works. Copy and paste the URL into a browser.

    Works for me.
    Works for me.
  7. Now – finally! promise! – you can use Down them All to download all those lovely image files. In order to do that you need to turn the text links into hot links. When I was testing this I first tried opening the text file in Firefox and pointing Down Them All to it, but it broke Down Them All – and I mean BROKE it. I had to uninstall Down Them All and delete everything out of my Firefox profile before I could get it to work again. Happily I found a tool that made it easy to turn those text links into hot links: Multilinkr. So now open a new tab in Firefox and open Multilinkr. Copy all the URLs from TextWrangler and paste them into the Multilinkr box. Click the “Links” button and gasp as the text links turn into hot links:
    Text links.
    Text links.
    Hot links *gasp*
    Hot links *gasp*

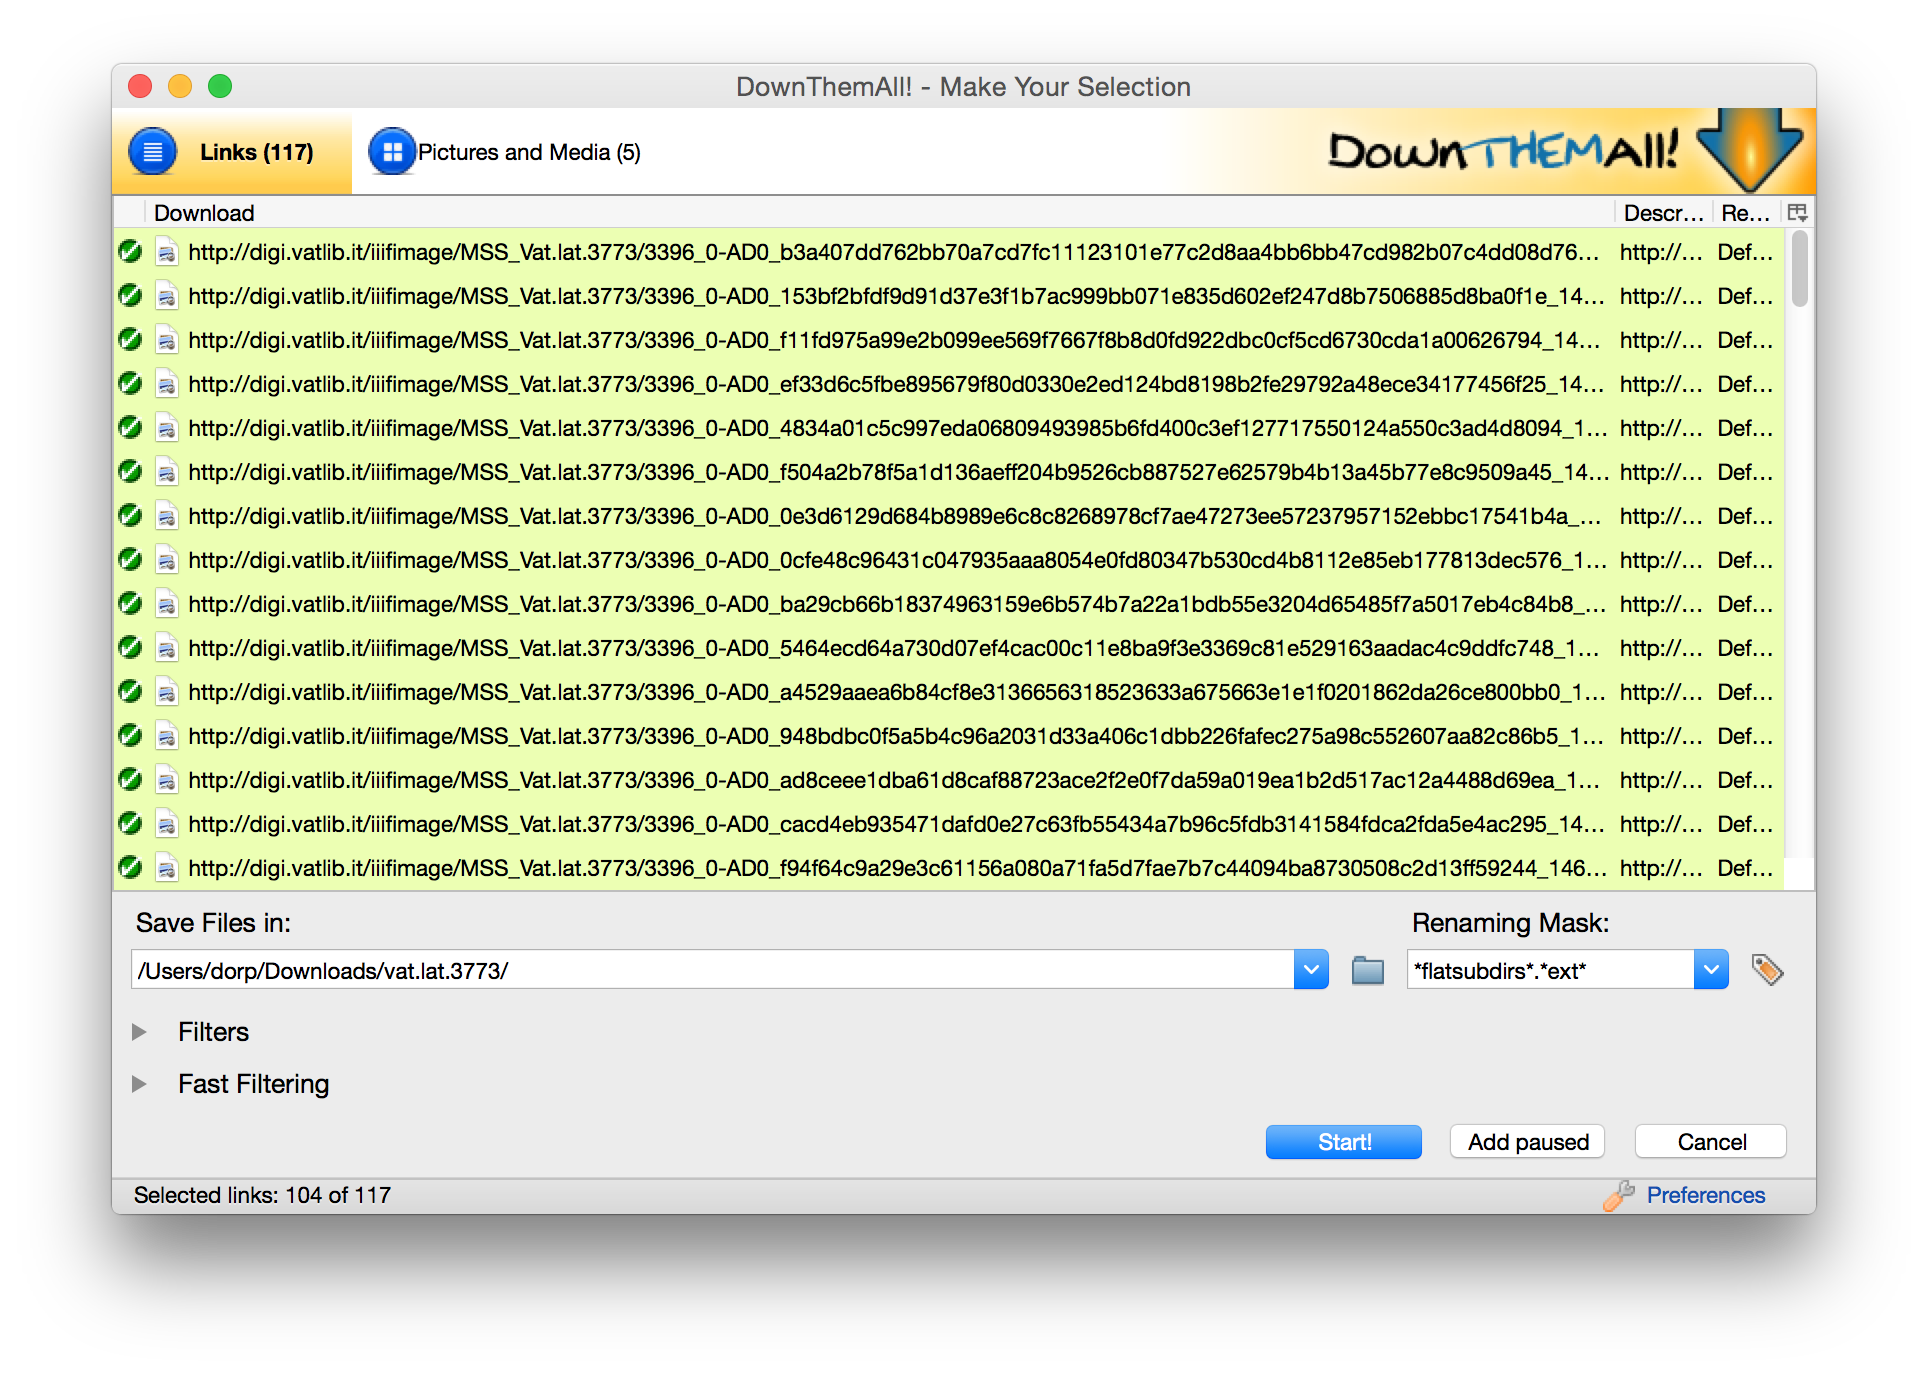
    Now go up to the Firefox “Tools” menu and select “Down Them All Tools > Down Them All” from the dropdown: Screen Shot 2016-07-21 at 1.51.15 PMDown Them All should automatically recognize all the files and highlight them. Two things to be careful about here. One is that you need to specify a download location. It will default to your Downloads folder, but I like to indicate a new folder using the shelfmark of the manuscript I’m downloading. You can also browse to download the files wherever you’d like. The second one is that Down Them All will keep file names the same unless you tell it to do something different. In the case of the Vatican that’s not ideal, since all the files are named “native.jpg”, so if you don’t do something with the “Renaming Mask” you’ll end up with native.jpg native.jpg(1) native.jpg(2) etc. I like to change the Renaming Mask from the default *name*.*ext* to *flatsubdirs*.*ext* – “flatsubdirs” stands for “flat subdirectories”, and it means the downloaded files will be named according to the path of subdirectories wherever they are being downloaded from. In the case of the Vatican files, a file that lives here:

    http://digi.vatlib.it/iiifimage/MSS_Vat.lat.3773/3396_0-AD0_f11fd975a99e2b099ee569f7667f8b8d0fd922dbc0cf5cd6730cda1a00626794_1469208118412_Vat.lat.3773_0003_pa_0002.jp2/full/full/0/native.jpg

    will be renamed

    iiifimage-MSS_Vat.lat.3773-3396_0-AD0_f11fd975a99e2b099ee569f7667f8b8d0fd922dbc0cf5cd6730cda1a00626794_1469208118412_Vat.lat.3773_0003_pa_0002.jp2-full-full-0.jpg

    This is still a mouthful, but both the shelfmark (Vat.lat.3773) and the page number or folio number are there (here it’s pa_0002.jp2 = page 2, in other manuscripts you’ll see for example fr_0003r.jp2), so it’s simple enough to use Automator or another tool to batch rename the files by removing all the other bits and just leaving the shelfmark and folio or page number.

There are other ways you could do this, too, using Excel to construct the URLs and wget to download, but I think the method outlined here is relatively simple for people who don’t have strong coding skills. Don’t hesitate to ask if you have trouble or questions about this! And please remember that the Vatican manuscript images are not licensed for reuse, so only download them for your own scholarly work.

How to download images using IIIF manifests, Part I: DownThemAll

IIIF manifests are great, but what if you want to work with digital images outside of a IIIF interface? There are a few different ways I’ve figured out that I can use IIIF manifests to download all the images from a manuscript. The exact approach will vary since different institutions construct their image URLs in different ways. Here’s the first approach, which is fairly straightforward and uses e-codices as an example. Tomorrow I’ll post a second post using on the Vatican Digital Library. Please remember that most institutions license their images, so don’t repost or publish images unless the institution specifically allows this in their license.

Method 1: The manifest has urls that resolve directly to image files

This is the easiest method, but it only works if the manifest contains urls that resolve directly to image files. If you can copy a url and paste it into a browser and an image displays, you can use this method. The manifests provided by e-codices follow this approach.

  1. Install DownThemAll, a Firefox browser plugin that allows you to download all the files linked to from a webpage. (There is a similar browser plugin for Chrome, called Get Them All, but it did not recognize the image files linked from the manifest)
  2. Go to e-codices, search for a manuscript, and click the “IIIF manifest” link on the Overview page.
    IIIF manifest link (look for the colorful IIIF logo)
    IIIF manifest link (look for the colorful IIIF logo)

    The manifest will open in the browser. It will look like a mess, but it doesn’t need to look good.

    Messy manifest.
    Messy manifest.
  3. Open DownThemAll. It will recognize all the files linked from the manifest (including .json files, .jpg, .j2, and anything else) and list them. Click the box next to “JPEG Images” at the bottom of the page (under “Filters”). It will highlight all the JPEG images in the list, including the various “default.jpg” images and files ending with “.jp2”

    Screen Shot 2016-07-14 at 4.46.47 PM
    JPEG images highlighted in Down Them All
  4. Now, we only want the images that are named “default.jpg”. These are the “regular” jpeg files; the .jp2 files are the masters and, although you could download them, your browser wouldn’t know what to do with them. So we need to create a new filter so we get only the default.jpg files. To do this, first click “Preferences” in the lower right-hand corner, then click the “Filters” button in the resulting window.
    Filters.
    Filters.

    There they are. To create a new filter, click the “Add New Filter” button, and call the new filter “Default Jpg” (or whatever you like). In the Filtered Extensions field, type “/\/default.jpg” – the filter will select only those files that end with “default.jpg” (yes you do need three slashes there!). Note that you do not need to press save or anything, the filter list updates and saves automatically.

    New filter
    New filter
  5. Return to the main Down Them All view and check the box next to your newly-created filter. Be amazed as all the “default.jpg” files are highlighted.

    AMAZE
    AMAZE
  6. Don’t hit download just yet. If you do, it will download all the files with their given names, and since they are all named “default.jpg” it won’t end well. It will also download them all directly to whatever is specified under “Save Files in” (in my case, my Downloads folder) which also may not be ideal. So you need to change the Renaming Mask to at least give you unique names for each one, and specify where to download all those files. In the case of e-codices the manifest urls include both the manuscript shelfmark and the folio number for each image, so let’s use the Renaming Mask to name the files according to the file page. Simply change *name* to *flatsubdirs* (flat subdirectories). Under “Save Files in”, browse to wherever you want to download all these files.

    Renaming Mask and Save Files in, read to go
    Renaming Mask and Save Files in, read to go
  7. Press “Start” and wait for everything to download.
    Downloading...
    Downloading…

    Congratulations, you have downloaded all the images from this manuscript! You’ll probably want to rename them (if you’re on Mac you can use Automator to do this fairly easily), and you should also save the manifest alongside the images.

    TOMORROW: THE VATICAN!

UPenn’s Schoenberg Manuscripts, now in PDF

Hi everyone! It’s been almost a year since my last blog post (in which I promised to post more frequently, haha) so I guess it’s time for another one. I actually have something pretty interesting to report!

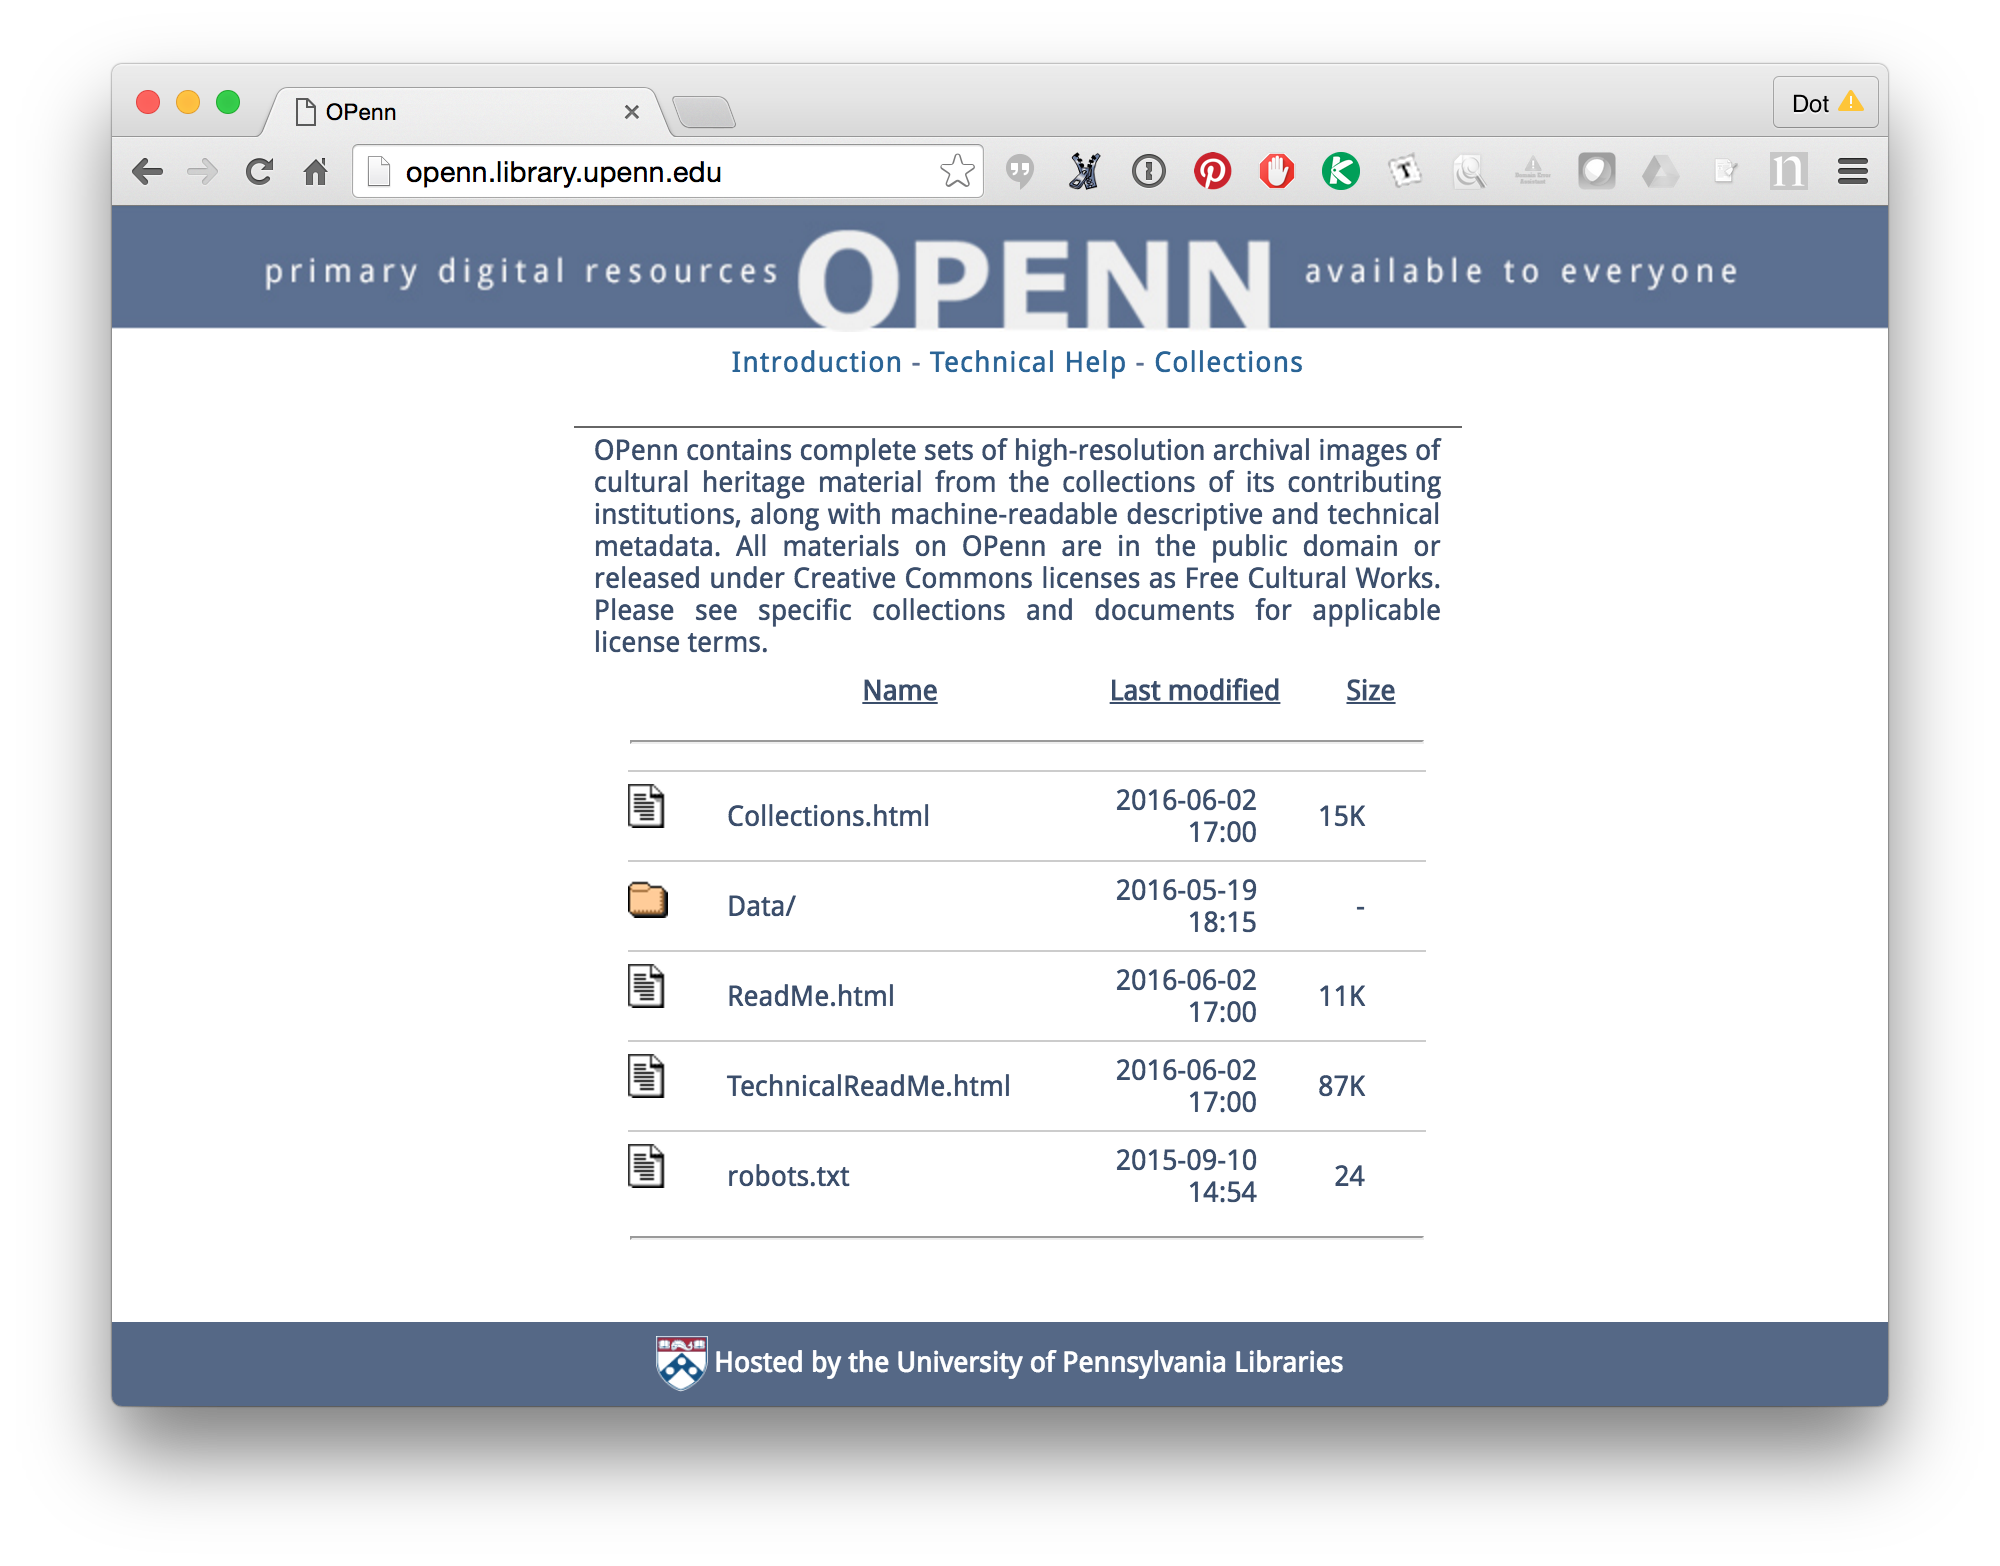
Last week I gave an invited talk at the Cultural Heritage at Scale symposium at Vanderbilt University. It was amazing. I spoke on OPenn: Primary Digital Resources Available to Everyone, which is the platform we use in the Schoenberg Institute for Manuscript Studies at the University of Pennsylvania Libraries to publish high-resolution digital images and accompanying metadata for all our medieval manuscripts (I also talked for a few minutes about the Schoenberg Database of Manuscripts, which is a provenance database of pre-1600 manuscripts). The philosophy of OPenn is centered on openness: all our manuscript images are in the public domain and our metadata is licensed with Creative Commons licenses, and none of those licenses prohibit commercial use. Next to openness, we embrace simplicity. There is no search facility or fancy interface to the data. The images and metadata files are on a file system (similar to the file systems on your own computer) and browse pages for each manuscript are presented in HTML that is processed directly from the metadata file. (Metadata files are in TEI/XML using the manuscript description element)

Screen Shot 2016-06-10 at 2.20.26 PM

This approach is actually pretty novel. Librarians and faculty scholars alike love their interfaces! And, indeed, after my talk someone came up to me and said, “I’m a humanities faculty member, and I don’t want to have to download files. I just want to see the manuscripts. So why don’t you make them available as PDF so I can use them like that?”

This gave me the opportunity to talk about what OPenn is, and what it isn’t (something I didn’t have time to do in my talk). The humanities scholar who just wants to look at manuscripts is really not the audience for OPenn. If you want to search for and page through manuscripts, you can do that on Penn in Hand, our longstanding page-turning interface. OPenn is about data, and it’s about access. It isn’t for people who want to look at manuscripts, it’s for people who want to build things with manuscript data. So it wouldn’t make sense for us to have PDFs on OPenn – that’s just not what it’s for.

Landing page for Penn in Hand.

HOWEVER. However. I’m sympathetic. Many, many people want to look at manuscripts, and PDFs are convenient, and I want to encourage them to see our manuscripts as available to them! So, even if Penn isn’t going to make PDFs available institutionally (at least, not yet – we may in the future), maybe this is something I could do myself. And since all our manuscript data is available on OPenn and licensed for reuse, there is no reason for me not to do it.

So here they are.

If you click that link, you’ll find yourself in a Google Drive folder titled “OPenn manuscript PDFs”. In there is currently one folder, “LJS Manuscripts.” In that folder you’ll fine a link to a Google spreadsheet and over 400 PDF files. The spreadsheet lists all the LJS manuscripts (LJS = Laurence J. Schoenberg, who gifted his manuscripts to Penn in 2012) including catalog descriptions, origin dates, origin locations, and shelfmarks. Let’s say you’re interested in manuscripts from France. You can highlight the Origin column and do a “Find” for “France.” It’s not a fancy search so you’ll have to write down the shelfmarks of the manuscripts as you find them, but it works. Once you know the shelfmarks, go back into the “LJS Manuscripts” folder and find and download the PDF files you want. Note that some manuscripts may have two PDF files, one with “_extra” in the file name. These are images that are included on OPenn but not part of the front-to-back digitization of a manuscript. They might include things like extra shots of the binding, or reference shots.

If you are interested in knowing how I did this, please read on. If not, enjoy the PDFs!

Screen Shot 2016-06-10 at 2.24.32 PM

How I did it

I’ll be honest, this is my favorite part of the exercise so thank you for sticking with me for it! There won’t be a pop quiz at the end although if you want to try this out yourself you are most welcome to.

First I downloaded all the web jpeg files from the LJS collection on OPenn. I used wget to do this, because with wget I am able to get only the web jpeg files from all the collection folders at once. My wget command looked like this:

wget -r -np -A “_web.jpg” http://openn.library.upenn.edu/Data/0001/

Brief translation:

wget = use the wget program
-r = “recursive”, basically means go into all the child folders, not just the folder I’m pointing to
-np = “no parent”, basically means don’t go into the parent folders, no matter what
-A “_web.jpg” = “accept list”, in this case I specified that I only want those files that contain _web.jpg (which all the web jpeg files on OPenn do)
http://openn.library.upenn.edu/Data/0001/ = where all the LJS manuscript data lives

I didn’t use the -nd command, which I usually do (-nd = “no directory”, if you don’t use this command you get the entire file structure for the file server starting from root, which in this case is openn.library.upenn.edu. What this means, practically, is that if you use wget to download one file from a directory five levels up, you get empty folders four levels deep then the top director with one file in it. Not fun. But in this case it’s helpful, and you’ll see why later.

At my house, with a pretty good wireless connection, it took about 5 hours to download everything.

I used Automator to batch create the PDF files. After a bit of googling I found this post on batch creating multipage PDF files from jpeg files. There are some different suggestions, but I opted to use Mac’s Automator. There is a workflow linked from that post. I downloaded that and (because all of the folders of jpeg images I was going to process are in different parent folders) I replaced the first step in the workflow, which was Get Selected Finder Items, with Get Specified Finder Items. This allowed me to search in Automator for exactly what I wanted. So I added all the folders called “web” that were located in the ancestor folder “openn.library.upenn.edu” (which was created when I downloaded all the images from OPenn in the previous step). In this step Automator creates one PDF file named “output.pdf” for each manuscript in the same location as that manuscript’s web jpeg images (in a folder called web – which is important to know later).

Once I created the PDFs, I no longer needed the web jpeg files. So I took some time to delete all the web jpegs. I did this by searching in Finder for “_web.jpg” in openn.library.upenn.edu and then sending them all to Trash. This took ages, but when it was done the only thing in those folders were output.pdf files.

I still had more work to do. I needed to change the names of the PDF files so I would know which manuscripts they represented. Again, after a bit of Googling, I chanced upon this post which includes an AppleScript that did exactly what I needed: it renames files according to the path of their location on the file system. For example, the file “output.pdf” located in Macintosh HD/Users/dorp/Downloads/openn/openn.library.upenn.edu/Data/0001/ljs101/data/web would be renamed “Macintosh HD_Users_dorp_Downloads_openn_openn.library.upenn.edu_Data_0001_ljs101_data_web_001.pdf”. I’d never used AppleScript before so I had to figure that out, but once I did it was smooth sailing – just took a while. (To run the script I copied it into Apple’s Script Editor, hit the play button, and selected openn.library.upenn.edu/Data/0001 when it asked me where I wanted to point the script)

Finally, I had to remove all the extraneous pieces of the file names to leave just the shelfmark (or shelfmark + “extra” for those files that represent the extra images). Automator to the rescue again!

  1. Get Specified Finder Items (adding all PDF files located in the ancestor folder “http://openn.library.upenn.edu”)
  2. Rename Finder Items to replace text (replacing “Macintosh HD_Users_dorp_Downloads_openn_openn.library.upenn.edu_Data_0001_” with nothing) –
  3. Rename Finder Items to replace text (replacing “_data_web_001” with nothing)
  4. Rename Finder Items to replace text (replacing “_data_extra_web_001” with “_extra” – this identifies PDFs that are for “extra” images)

The last thing I had to do was to move them into Google Docs. Again, I just searched for “.pdf” in Finder (just taking those that are in openn.libraries.upenn.edu/Data/0001) and dragged them into Google Drive.

All done!

The spreadsheet I generated by running an XSLT script over the TEI manuscript descriptions (it’s a spreadsheet I created a couple of years ago when I first uploaded data about the Penn manuscripts on Viewshare. Leave a comment or send me a note if that sounds interesting and I’ll make a post on it.